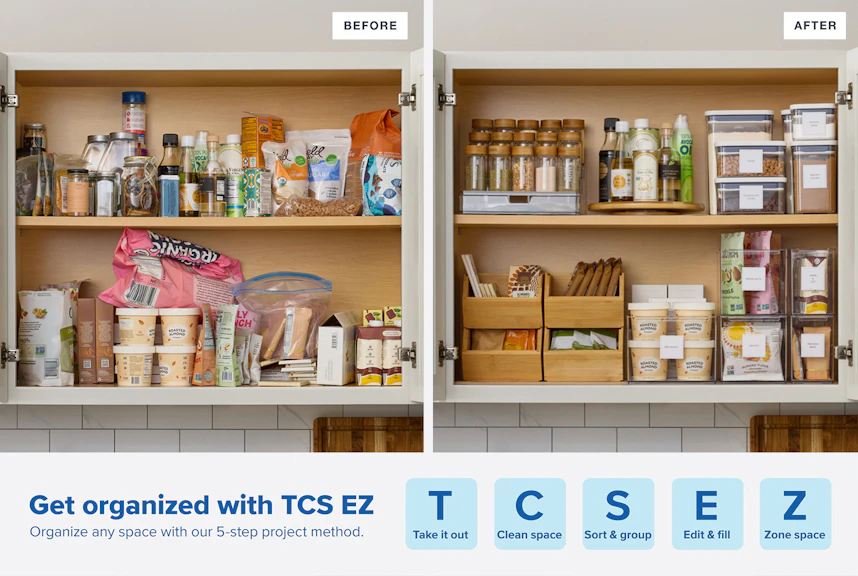
Maximizing your pantry cabinet can be tricky--particularly if you have limited kitchen space to work with. To help you through the process, we recommend using TCS EZ, our 5-step project method outlined for you below...

Step 1 - Take it out

Empty the cabinet of all of its contents. This makes it easier to both see the amount of space you have to work with, and the items you need to store.
Step 2 - Clean space

Dust and wipe down the space with the appropriate cleaning product. (Sometimes just a damp rag will do.) Then, measure the dimensions of the shelves and add a liner to protect the surfaces from spills and make them easier to clean in the future.
Step 3 - Sort & group

Next, turn your attention to the pantry's contents by sorting and grouping the items into categories. Put like-items together: spice bottles, condiments & sauces, dry ingredients, etc. Once you'd taken an inventory of what you need to store, choose the appropriate organizers.
Step 4 - Edit & fill

As you sort, check the expiration dates of food items and discard any outdated ones. If possible, decant spices into matching bottles and dry ingredients into matching airtight containers.
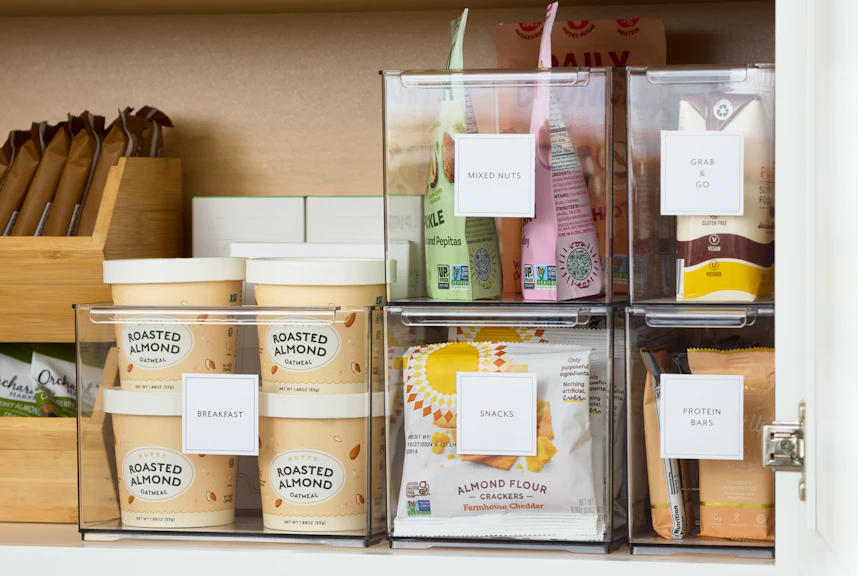
Step 5 - Zone space

Finally, put the pantry's contents back, using the organizers you've chosen to create zones. As a finishing touch, add labels to help you identify these zones more easily.