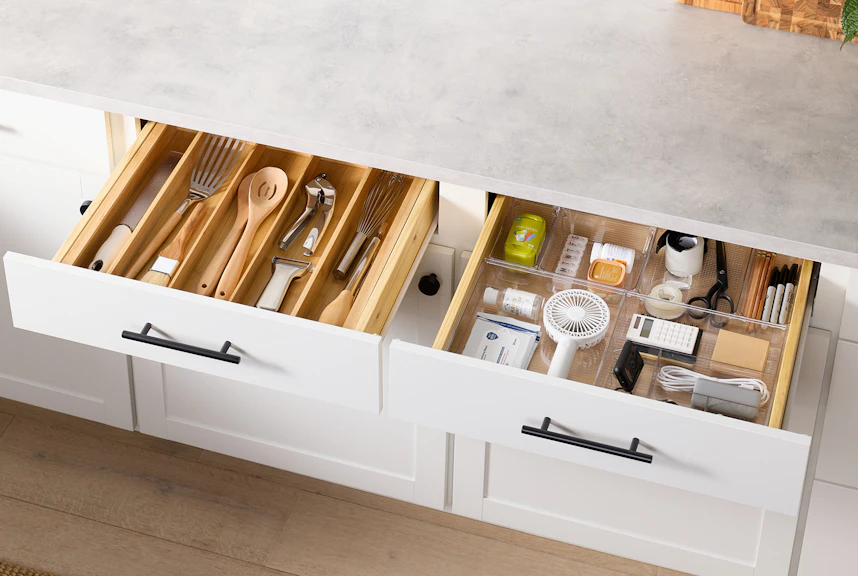
Cluttered, disorganized kitchen drawers can be very frustrating, especially when they look something like this:

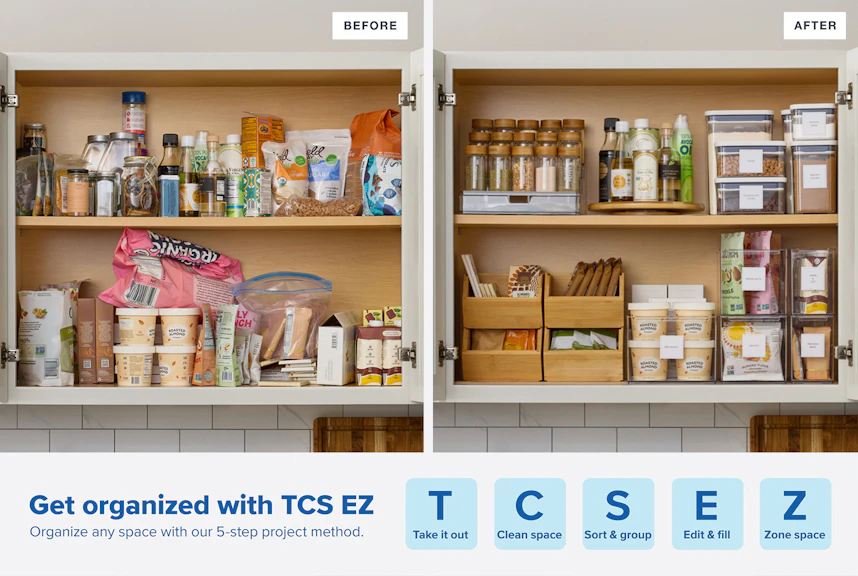
Luckily, using the "TCS EZ" 5-step project method, you can reduce the clutter and tidy them up in no time.
See the steps below to find out more...

Step 1 - Take it out

To properly take stock of your space and what you need to store, empty the cluttered drawers completely and set the contents off to the side.
Step 2 - Clean space

Clean and wipe down the inside of the drawers, then measure the width, depth, and height of the inside. Add liners to the drawer (this will make them easier to clean in the future), and then use the measured dimensions to help you determine which drawer organizers will work best.
Step 3 - Sort & group

Go through the contents of the drawers, sorting them into categories (cutlery, cooking utensils, knives, etc.), then group them by size and type.
Step 4 - Edit & fill

Discard any broken items, and put any items you no longer need into a donation pile. Then begin adding the appropriate drawer organizers to the space.
Step 5 - Zone space

Use the drawer organizers to create "zones" for each type of item. The organizers will keep these like-items together and help prevent the drawer from becoming messy again. (If it's helpful, you may even add labels to each section to help you remember where everything goes after unloading the dishwasher.)