It's that time of year when we're all obsessed with all things pumpkin. Pumpkin spiced latte, pumpkin patches, and most certainly Jack-o-lanterns. I think I have purchased every single magazine out there that features anything pumpkin on its cover. I can't get enough of that bright orange fall fruit/vegetable! (I can't ever remember which it is!)
If you're looking to plan a creative and fun Halloween party this year, The Container Store is full of awesome solutions and decorations to put together a perfectly spooky and fun Halloween scene! Easy is the key to my heart when it comes to DIY, so I just loved these ideas for decorating the house in frightful, fall fashion!
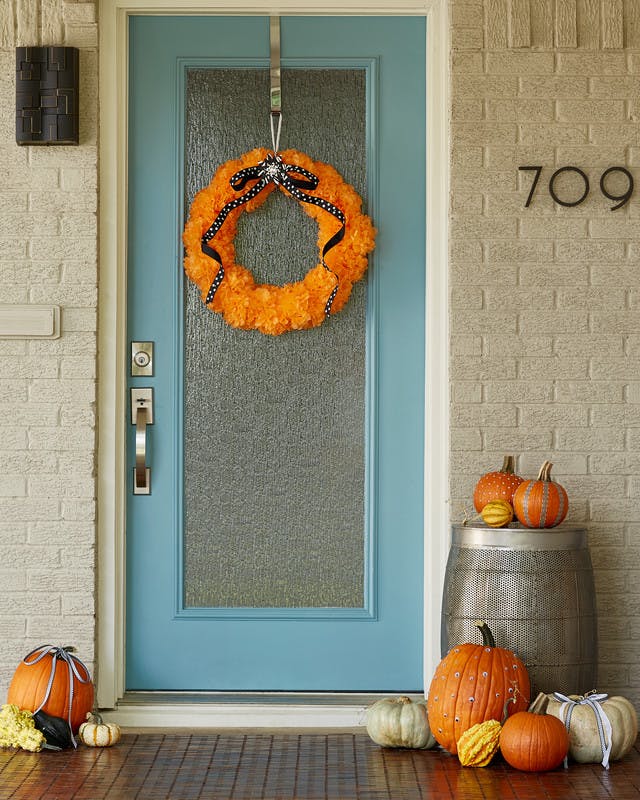
This tissue paper pom-pom wreath is simple and striking and gives your guests a welcome that says there's a treat waiting behind the door! After Halloween, you can change up the bow at the top for Thanksgiving and the rest of the fall season!
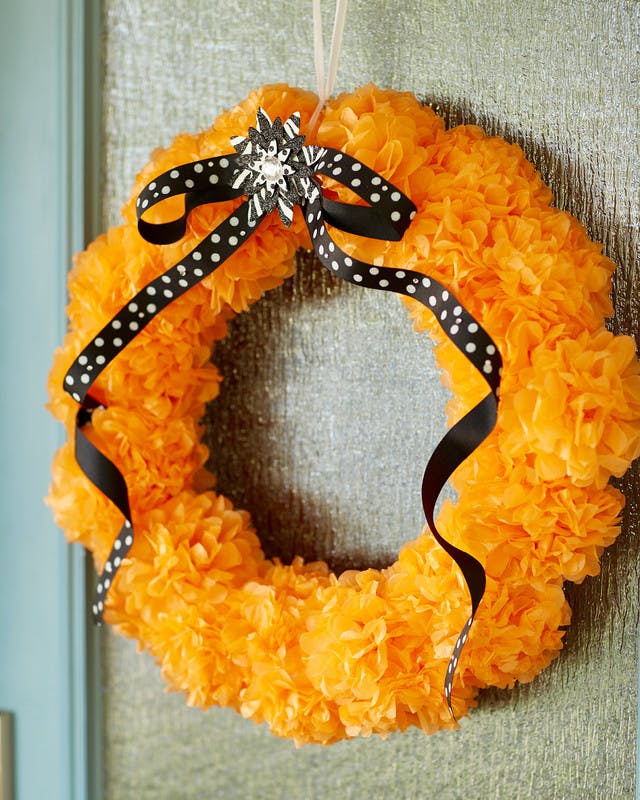

Featured Products: Orange Tissue Paper Pom Pom Kits // Black & White Polka Dot Grosgrain Ribbon // Black & White Flower Gift Décor // Stainless Steel Scissors
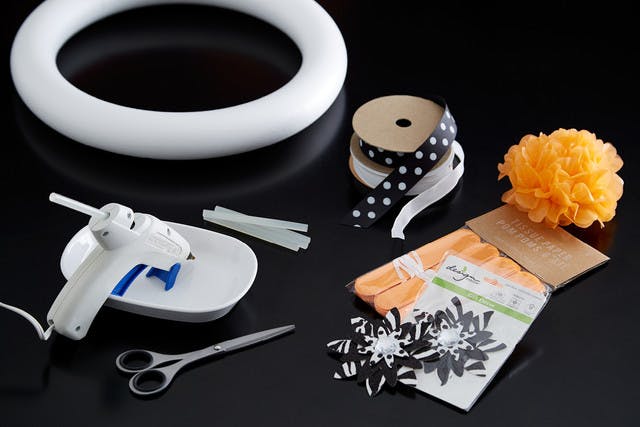
Tissue Pom-Pom Wreath
Materials
• Tissue paper pom-poms
• Styrofoam wreath
• Hot glue gun
• Hot glue sticks
• Variety of ribbons
• Stick-on flower
• Scissors
1. Assemble the tissue pom-poms
2. Glue the pom-poms onto the wreath, covering it's front only
3. Tie a short ribbon at the top center of the wreath and thread another ribbon through it for hanging from your door
4. Tie another longer ribbon through the same short ribbon for the front bow
5. Adhere your stick-on flower onto the top of the wreath of the center of the bow
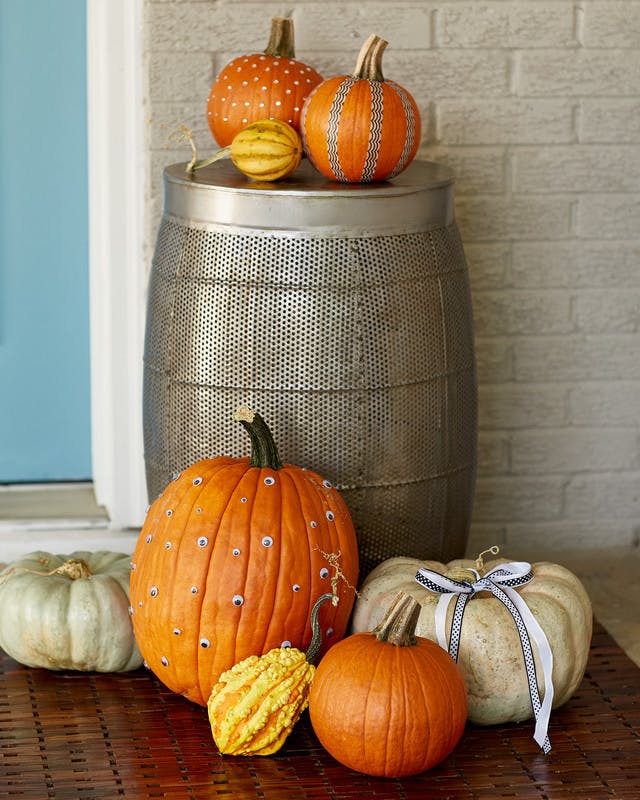
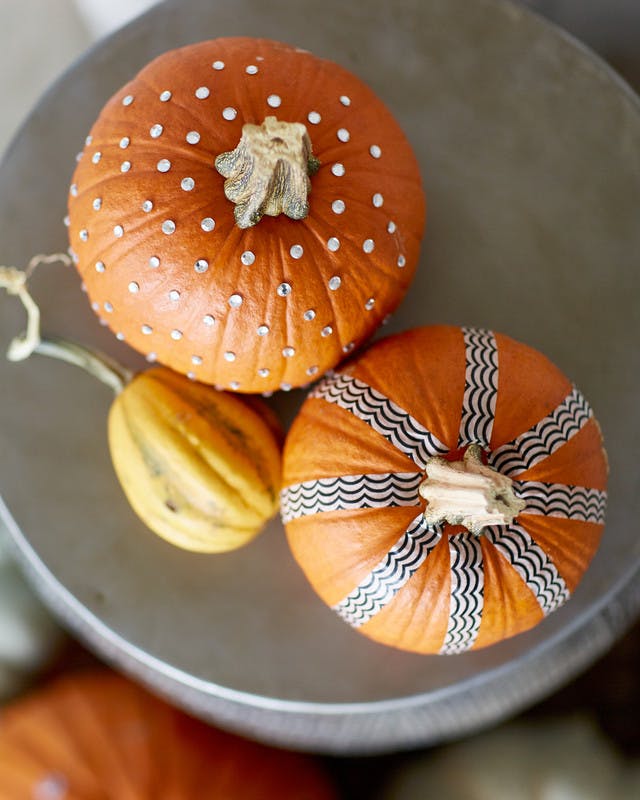
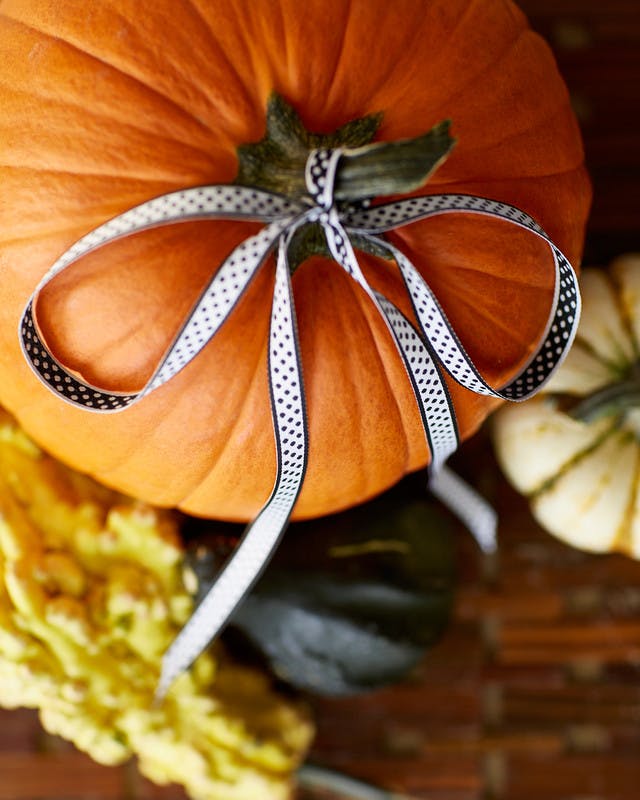
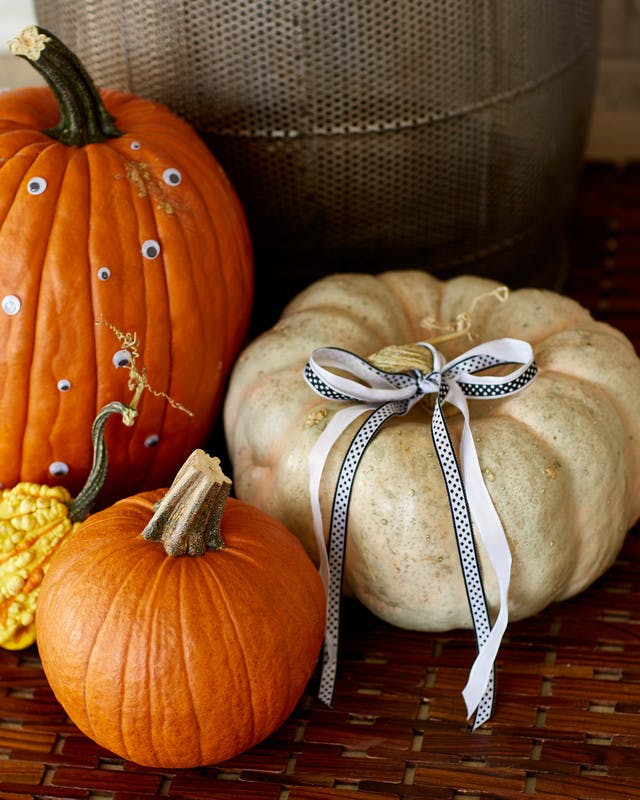
Featured Products: Black & White Dot Reversible Ribbon // White Grosgrain Ribbon // Black Waves Washi Paper Tape // Clear Rhinestone Stickers
You can't get much easier than this in the way of pumpkin decorating. Just fire up your glue gun and add googly eyes for a whimsical touch. We also love the simple use of ribbon and decorative tape to pretty up your pumpkin.
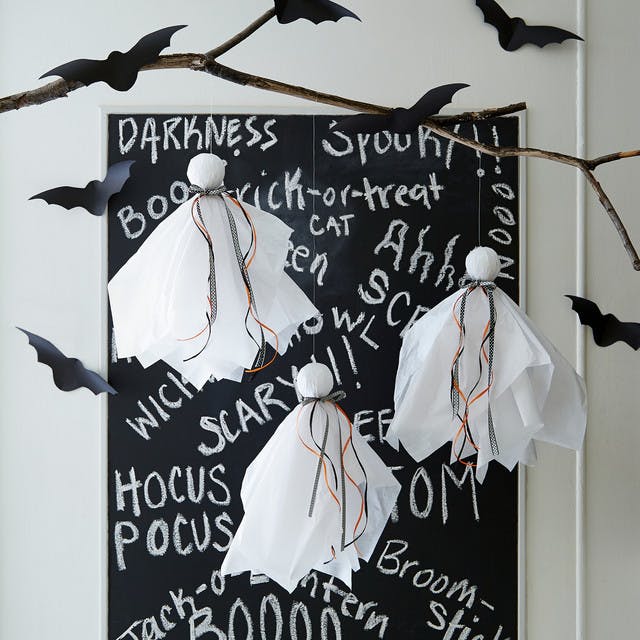
Another, spookier front door scene mixes a backdrop of Halloween inspired words surrounded by a colony of bats and a group of ghosts. Grab a roll of black matte wrapping paper and measure and cut it in the length of the front door. Carefully write your favorite haunting sayings on it with chalk. Your kiddos will love getting in on the fun!
Flying Bats
Materials
• Black wrapping paper
• Scissors
• Double-sided tape
• Bat template
1. Cut a piece of black wrapping paper that is 2x the length of the bat template. Download the bat template here
2. Fold that piece of paper in half, lengthwise
3. Place the template over the folded piece of paper and trace the outline
4. Cut along the trace lines
5. Open the cut piece of paper and adhere to walls or furniture with double-sided tape
Featured Products: White Tissue Paper // Black & White Chevron Ribbon // Black & White Dot Reversible Ribbon // Orange Raffia // Black Raffia // Stainless Steel Scissors
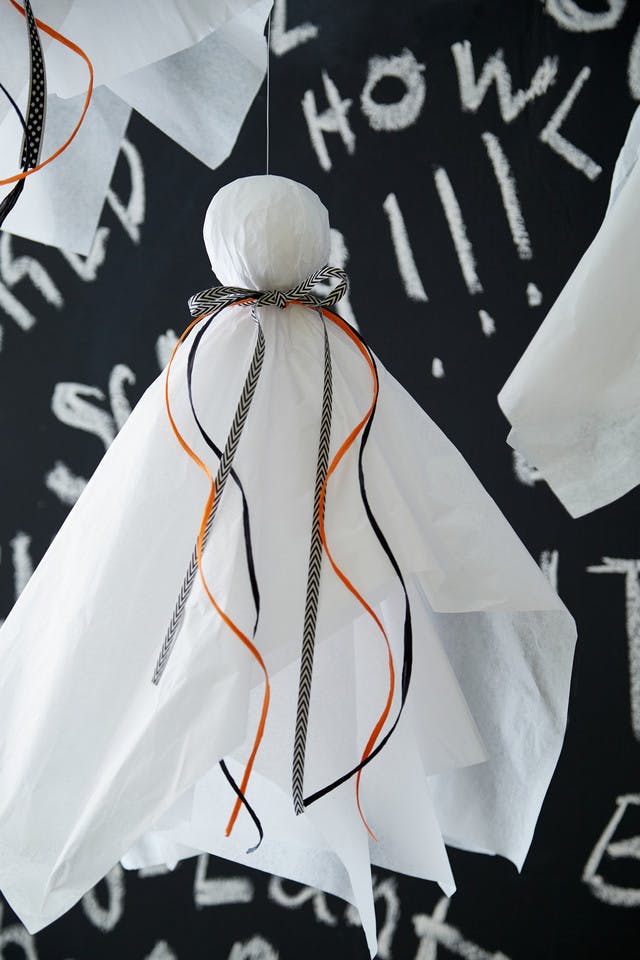
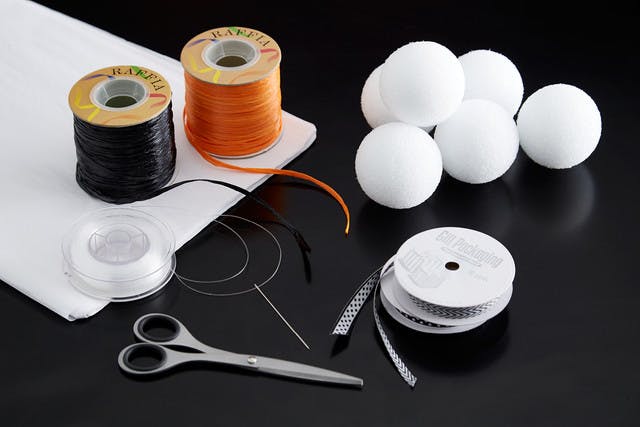
Tissue Paper Ghosts
Materials
• Styrofoam balls
• White tissue paper
• Ribbon and raffia string
• Thick-gauge needle
• Monofilament
• Scissors
1. Drape a couple of pieces of white tissue paper over the Styrofoam ball
2. Tie your choice of ribbon and raffia string around the tissue paper underneath the Styrofoam ball, creating a "neck"
3. Thread the needle with monofilament string
4. Thread the needle through the Styrofoam ball at its base underneath the tissue paper and out through the top
5. Hang the ghost from this string as desired
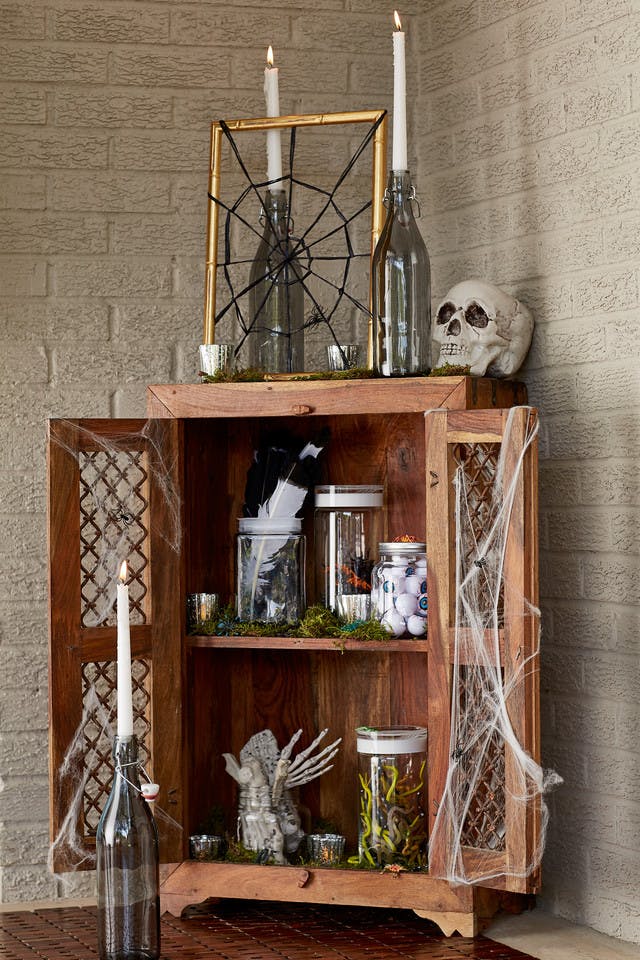
If you have an old cabinet or armoire that you can easily move to the porch, give this one a try. We love the spider web art that adorns the top of our cabinet. We painted an inexpensive frame gold and used our black ribbon to create a spider web. The web is attached by black gaffers tape on the backside of the frame.
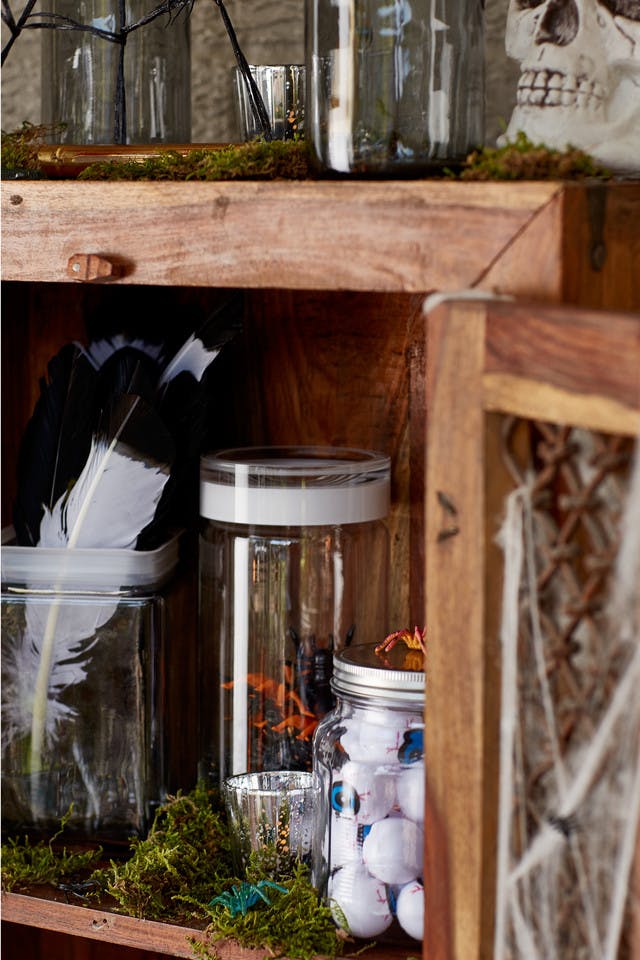
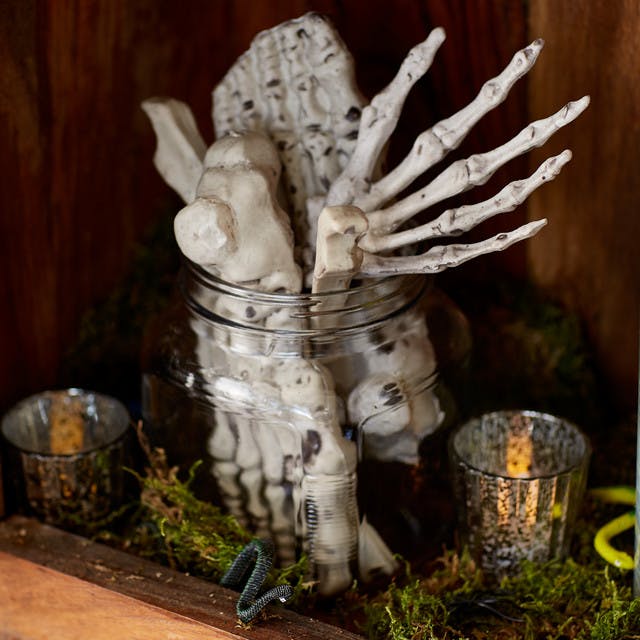
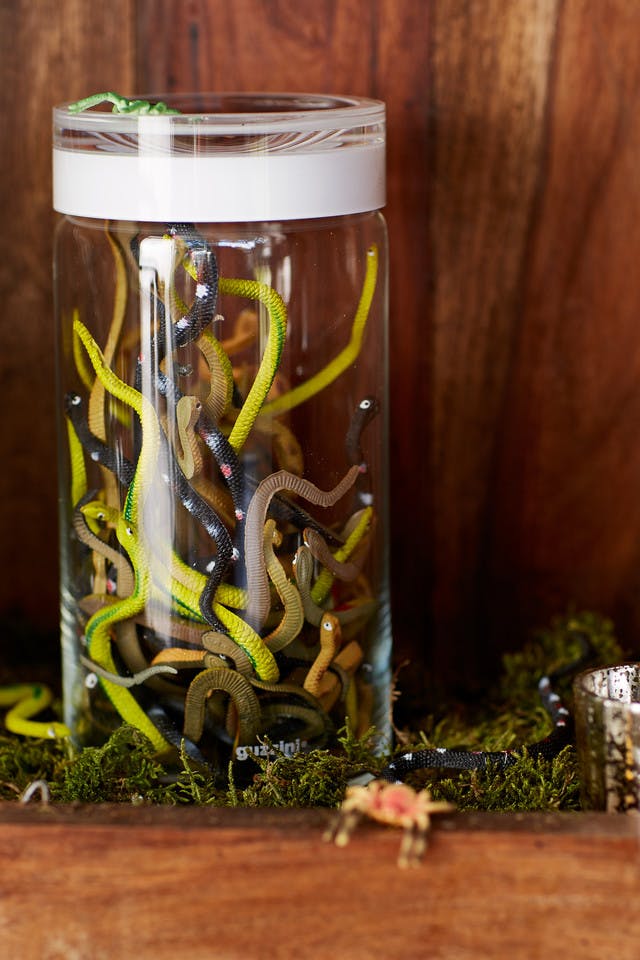
Featured Products: Blanca Glass Canisters // Glass Cracker Jar // Grey Giara Water Bottle
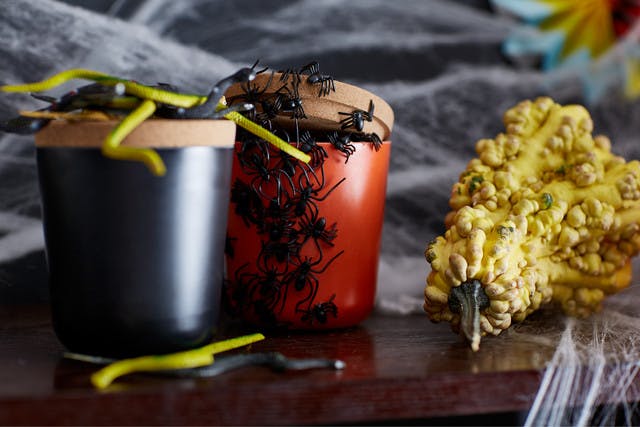
Our glass jars hold the perfect specimens of snakes, plastic eyeballs, and plastic skeleton parts from the hobby or craft store.
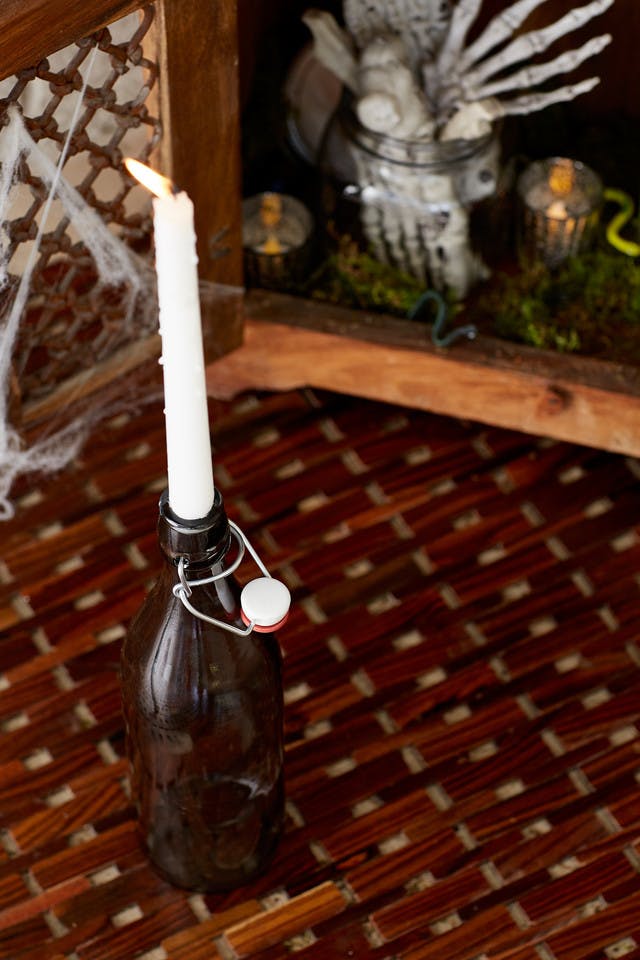
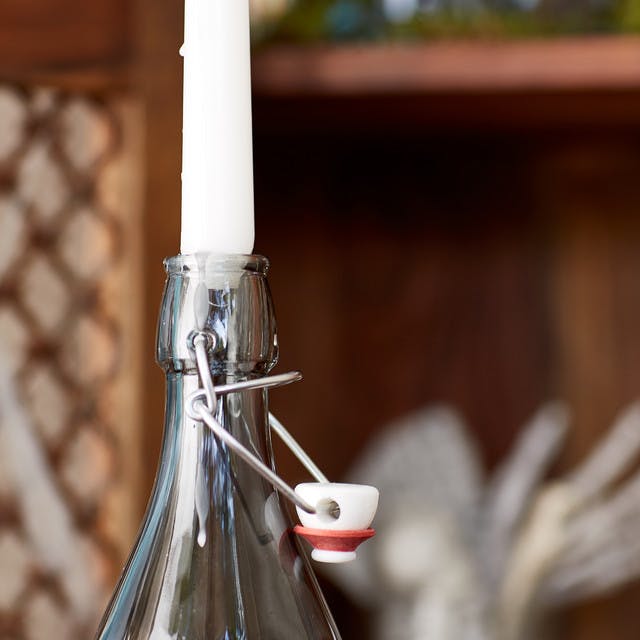
We used our bottles as candle sticks for the ever-important Halloween illumination. Light the taper candle and let the wax drip a bit to give the bottle an aged, haunting look.
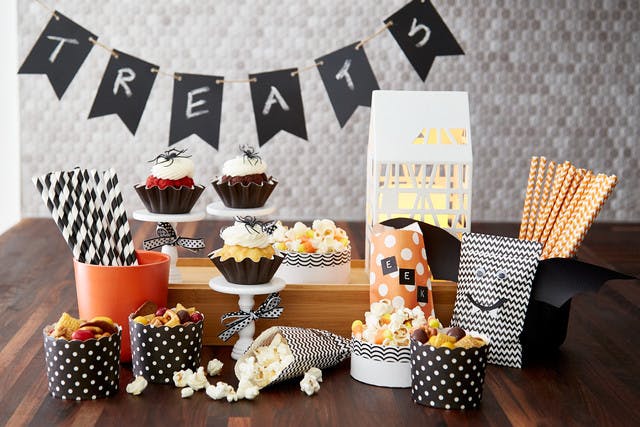
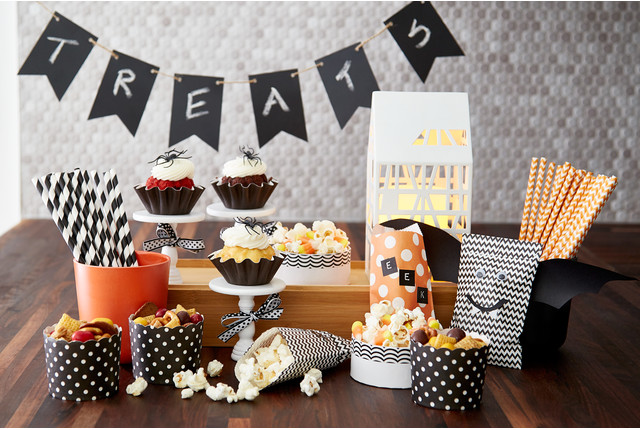
Featured Products: Chalkboard Pennant Banner // Wooden Cupcake Stand // Large Bamboo Jar // Small Round White Gift Box // Black Waves Washi Tape // Treat Sacks // Paper Straws // Large Baking Cups // Black & White Dot Reversible Ribbon // Black Typewriter Alphabet Stickers // Chalkboard Marker
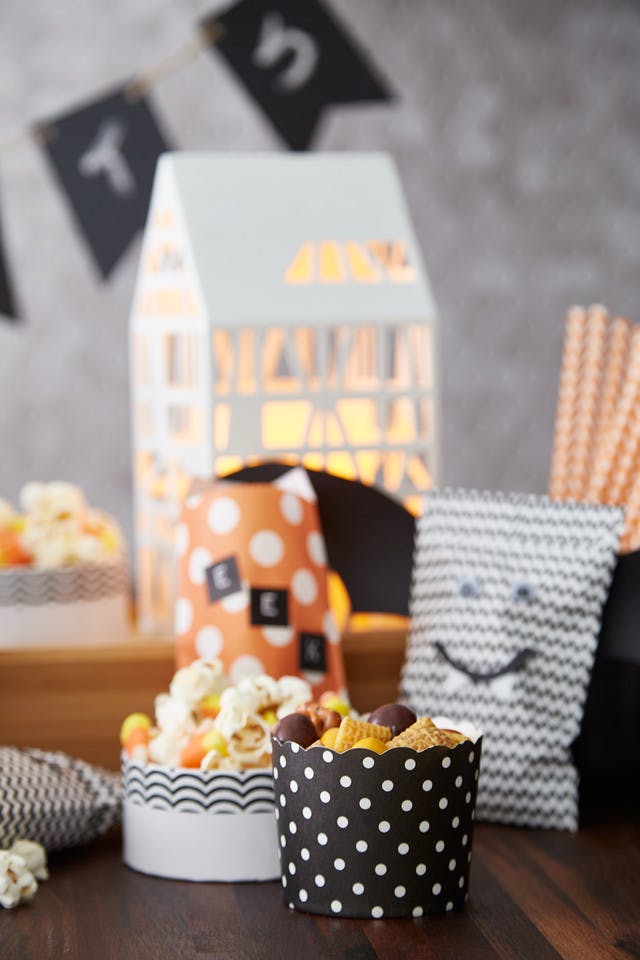
From the chalk-lettered banner, to the sacks, cupcake stands and containers that hold tasty treats, we have so many options for your Halloween spread. My favorite is the treat sack decorated with bat wings, googly eyes, and a vampire grin using decorative tape!
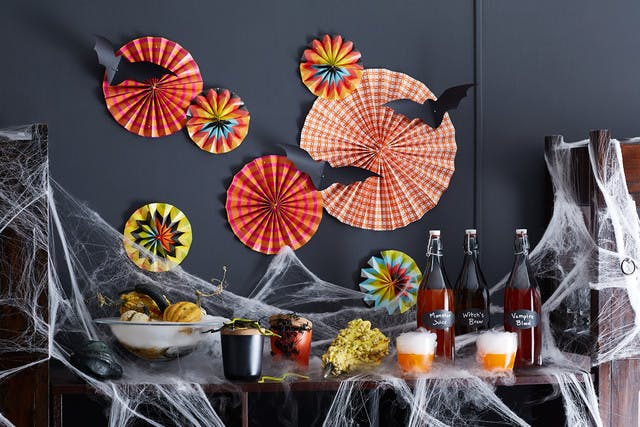
Your guests are going to love this batty bar! Wrapping paper pinwheels will have them mesmerized before they even have a sip of your witch's brew!
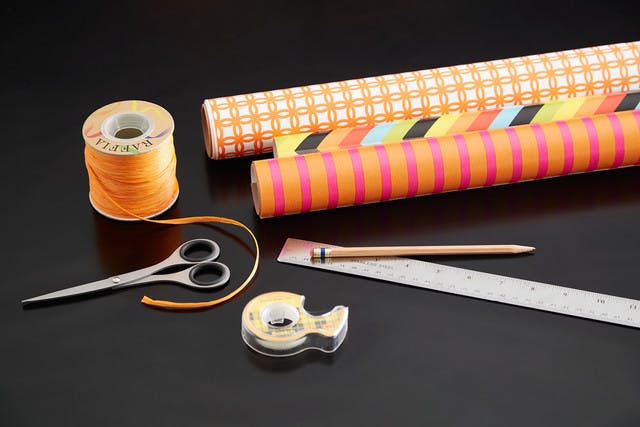
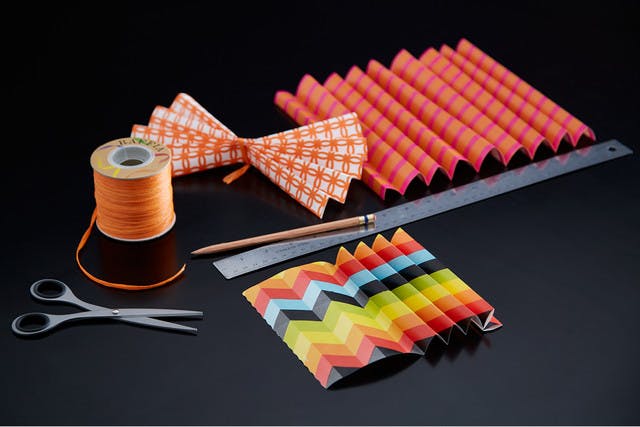
Featured Products: Pink & Orange Stripe Reversible Gift Wrap // Orange Treeless Wrap // Orange Raffia // Stainless Steel Scissors
Wrapping Paper Pinwheels
Materials
• Wrapping paper
• Scissors
• Ruler
• Pencil
• Double-sided tape
• Raffia string
1. Cut various pieces of wrapping paper measuring 2x the width in length
2. Fold accordion pleats down the length of the paper
3. Gather the pleats and tie a piece of raffia paper at the center
4. Fan out the edges and tape together at the seams with double-sided tape
5. Pin or tape to wall as desired

We hot glued slithering snakes and creepy, crawly spiders on our orange and black bamboo jars. Boo! You've got haunting vessels to use for many Halloweens to come!
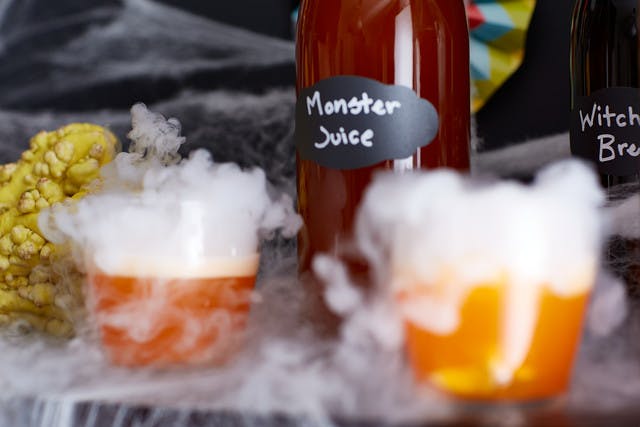
Featured Products: Grey Giara Water Bottles // Avery Decorative Removable Chalkboard Labels // White Fine Tip Chalk Markers
What do you have brewing this year? Let us know in the comments!
